Blog Archive
-
Recent Posts
Labs: XCode Static Library Pitfalls
June 10, 2011 by Sensei
Categories: Labs
Much, much, much has been written on the various processes available to get static libraries to function in XCode. But somehow, these all seemed to have problems for me, in many different ways. In my journey to getting static libraries working I tried all kinds of weird things, and in the end, I think I have something that functions as expected. I have created a sample workspace that illustrates how to set up an ios and osx application that each use two versions of a static library. This entry details the hoops jumped through, and gotchas to avoid.
Objectives
- If a static library is modified, it should automatically recompile.
- If a static library is modified, and you are working on a product that depends on it, it should recompile the product also.
- A product needs to be able to compile for debugging, release AND archiving without modification.
- Complex projects should not require complex maintenance. You should not need to add headers to other projects, etc. in order to create links.
- Autocompletion should function as expected.
Basic Overview
- Create a Workspace.
- Add your libraries and projects to the workspace.
- Link your libraries to your applications in the Build Phases of your application.
- Add your libraries to your Schemes.
- Create Source Trees and add these to your User Header Search Paths.
- Skip Install = YES.
- Fix static library links in your projects by manually modifying your .pbxproj file.
Create A Workspace
In XCode 4, the idea of workspaces is supposed to supersede the functionality of XCode 3′s ‘cross-project references‘. XCode 4 still allows for cross-project references, but I’ll be honest, I couldn’t get them to work. It would crash XCode, and it would sometimes wedge the project file and I wouldn’t be able to open it again. Also, there is no documentation on *how* to do cross-project references in XCode 4, so I was flying pretty blind.
Add Libraries and Applications to the Workspace
In XCode 3, you would create a hierarchy of projects. In XCode 4, you flatten these projects out in a workspace and link them together. The first step is to add the projects. If you create new projects, you can add them as a cross-project reference, or you can add the project to the workspace. The latter is what you want. You can add an existing project just like you would add a file by dragging the .xcodeproj file into the Navigator Pane.
Make Your Build Directory Consistent
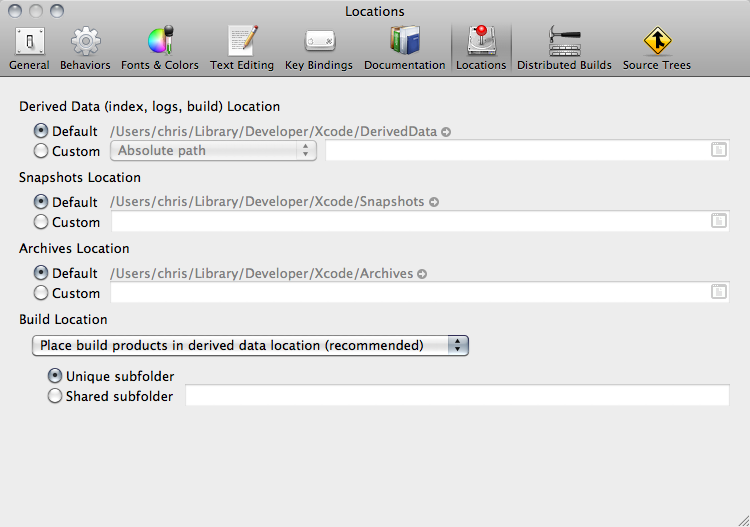
Make sure that under Preferences->Locations that you have the following settings. I’ll be honest, I’m not sure how important this step is. ![]()
Link Your Libraries
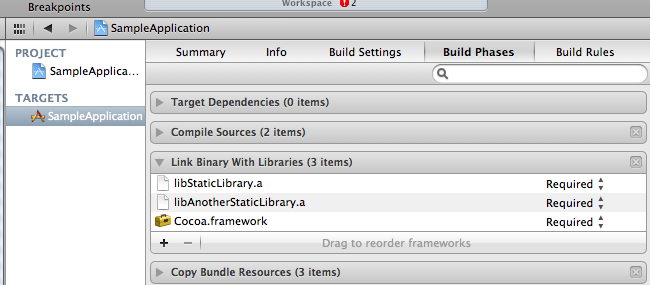
Select your Project in the Navigator Pane. Select the Build Phases section and expand the Link Binary With Libraries view. Click the + button and add the static library to the list. Doing so will create an instance of the static library in the project in the root. I usually like to move these into the ‘Frameworks’ folder to reduce clutter.
Troubleshooting: If you get Linker Errors when you compile, it’s very possible you forgot to do this step.
Add Libraries to Schemes
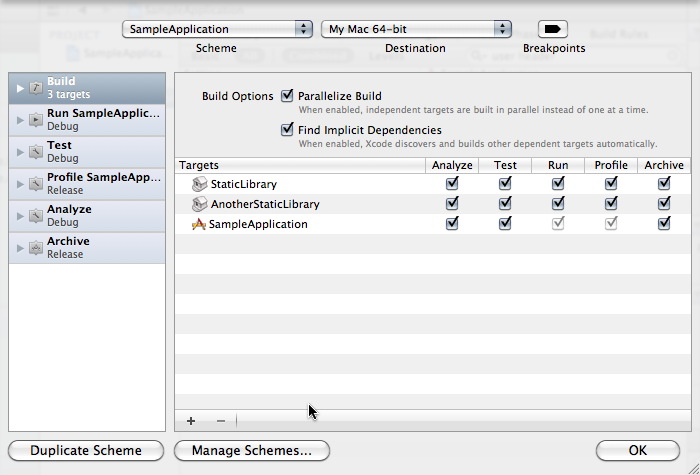
When adding a library to a project it must be added to the scheme in order for it to be re-compiled. Without this step, the library will not recompile when changes occur.
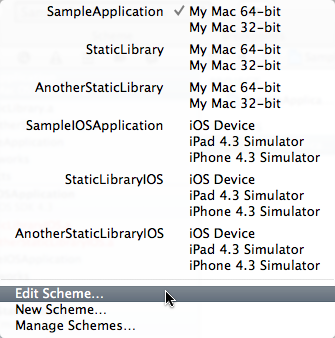
Schemes are the settings used to compile and run an application. This differs from Targets…in some arbitrary way Apple deems necessary. Anyway, choose the Scheme of the application that has a library dependency. Then choose ‘Edit Scheme…’ from the drop-down Scheme menu.
Under Build, add the Libraries to the list given. Uncheck ‘Parallelize Build’ (explanation given later). Make sure they are built before your application is built.
NOTE: Schemes are unique to each user. So if you are working in a team, these steps must be re-applied by each team member. Sucks, I know.
Troubleshooting: Sometimes adding static libraries in the Scheme Editor won’t show up. The libraries have been added, just close the scheme editor and re-open, they will show up. Sometimes when you click to drag the library, another option shows up. Release the mouse and try again, it will correct itself.
Create Source Trees
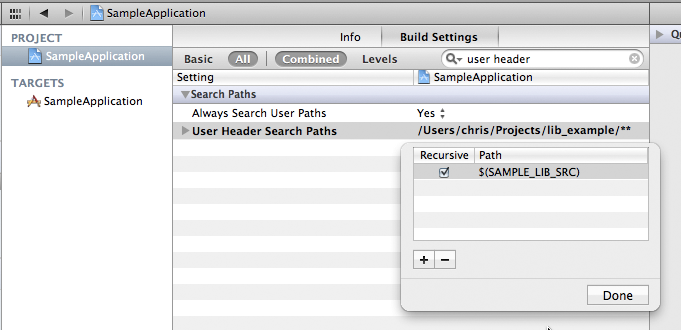
We must now tell XCode where the headers are located in our library so that things compile correctly. By using the ‘Source Tree’ functionality of XCode, you can set a location on your drive, and then use that as a location XCode uses to find your headers.
If you know that you are not going to have duplicate code in your project you can simply put the entire project under one Source Tree. This will place the libraries, applications, etc. all under one umbrella which XCode will have access to.
You may then add this variable in the Build Settings on the project under the User Header Search Paths setting, and check the ‘recursive’ checkbox.
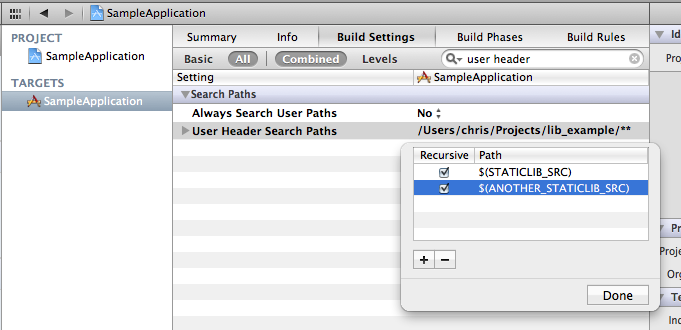
This will not work in Projects that have multiple copies of the same classes. You will most likely get compilation errors. In this case you may want to create Source Tree variables for each of your libraries, and add them uniquely:
The Ghost Header Problem
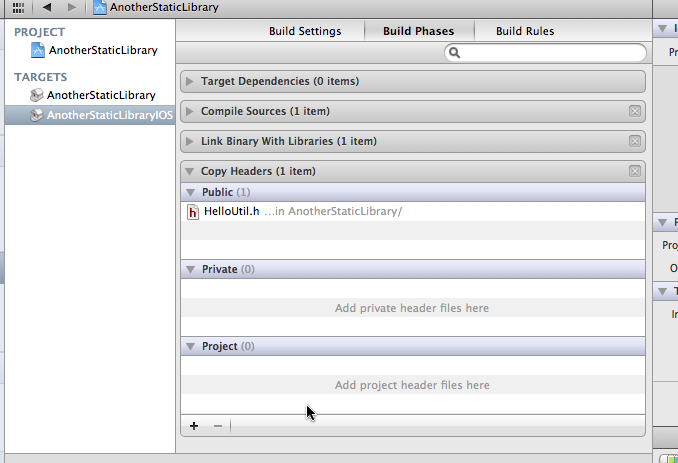
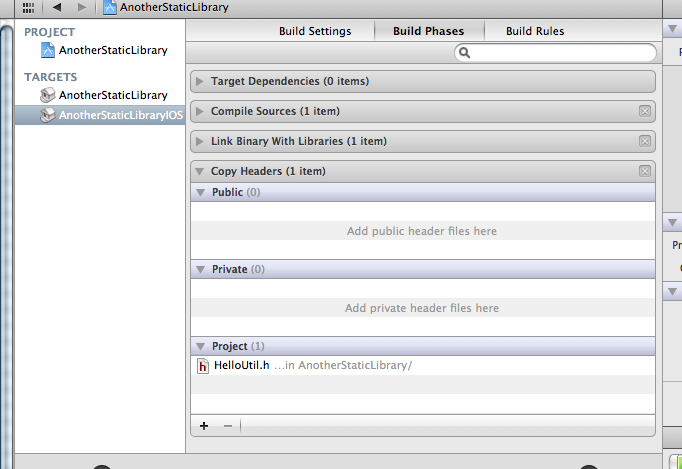
The use of Source Trees is where my solution differs heavily from others. One solution here mentions making your headers Public in your static library. I’ve found this can cause some seriously hard-to-debug compilation issues. An example that occurred is that I renamed a file, but forgot to refactor one file that referenced the old filename. To my surprise, it compiled fine for me, but not for my friend. Where was this ‘ghost’ header? It was copied to the Derived Data/Products folder:
It doesn’t go away on clean, you manually have to delete these headers from the Derived-Data/Products folder!
The Archiving/AutoComplete Problem
If your headers are public, they are put into the Products folder as mentioned above. This causes the archiver to blow up, as it cannot determine what to do with them. So if you’ve made them Public, you’re going to have to make them Protected to actually ship your product. That can be a nasty surprise at the end of development.
But if your library’s headers are Protected, then how does the app see them? Another solution mentions dragging your headers from the library into your project, so that the project has a reference to the headers. I’ve attempted this and found it to be very tedious. Perhaps in smaller, or more stable projects this is more functional.
Additionally Autocomplete does not function as expected without Indexing Headers.
Source Trees Solve the Ghost Header Problem and the Archiving Problem
While its annoying to have to set up environment vars on a per-user basis, I feel it is the best solution. Its less tedious than the Indexing Headers approach. I don’t use autocomplete, but a friend says this functions as expected.
The big problem, as detailed below, is that clang will crash XCode upon attempting to analyze a Source Tree environment variable that is not set. You must set your preferences prior to opening the workspace. This may seem like an insurmountable problem, but so far we’ve had little problems with this approach.
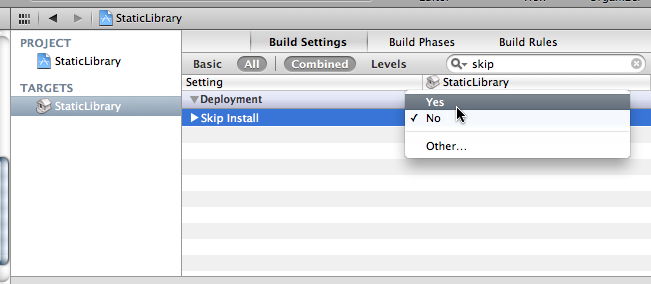
Skip Install = YES
Set this in your libraries so that they are not installed, otherwise you will have archiving issues. For more info check out the SKIP_INSTALL var in the Build Setting Reference.
Fix Static Library References
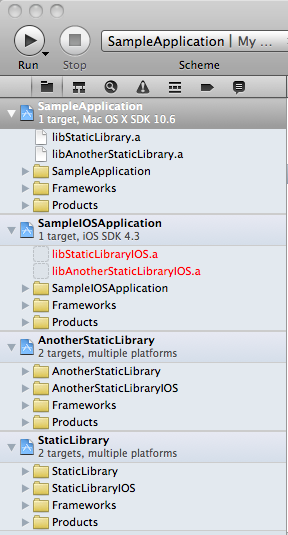
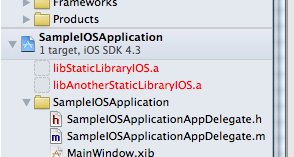
Depending on the current phase of the moon and amount of Snow Leopard blood used in your XCode incantations, your static library will either show up as it should, or it will be in red and show a ‘missing file’ icon.
If it’s in red, it probably means that it’s not going to accurately recompile when changes are made. Probably. To fix this requires some serious mojo.
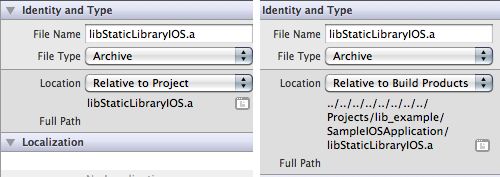
First, in the organizer, select your library. Make sure the utilities pane is open on the right-hand side.
Change the ‘Relative to Project’ to ‘Relative to Build Products’. You’ll notice that a large number of ‘../../../’ are added to the front of your library.
We now need to close out the workspace and manually modify the pbxproj file. Close out your workspace. Download a real text editor, like vim, emacs, or jEdit. ![]()
Open the YourProject.xcodeproj/project.pbxproj file and search for the library name. You’ll come across a line that includes:
path = ../../../../../../../../Projects/lib_example/SampleIOSApplication/libStaticLibraryIOS.a;
Remove everything in the path except the filename like so:
83439CC413A153A70096D679 /* libAnotherStaticLibraryIOS.a */ = {isa = PBXFileReference; explicitFileType = archive.ar; name = libAnotherStaticLibraryIOS.a; path = libAnotherStaticLibraryIOS.a; sourceTree = BUILT_PRODUCTS_DIR; };
83439CC613A153AB0096D679 /* libStaticLibraryIOS.a */ = {isa = PBXFileReference; explicitFileType = archive.ar; name = libStaticLibraryIOS.a; path = libStaticLibraryIOS.a; sourceTree = BUILT_PRODUCTS_DIR; };
Close out the file. Re-open your workspace. You should hopefully get working recompiles.
Random Issues You May Come Across
Cross-project References Bug
Creating Cross-Project References cause some serious hard-crashes on my system. I was unable to get them to work, and if I did not revert via version control I would generally work the project into a wedged state what would just crash upon open.
Source Tree Not Set Will Crash XCode
If you open a project that uses this approach, but do not have the Source Tree vars set, it will crash XCode. Clang will attempt to analyze the source code of the non-existent environment variable set for the library, and will crash xcode. Until Apple fixes this, I would recommend setting the variables before attempting to open the project.
Parallelized Build Bug
Depending on the time it takes to compile something, XCode may not correctly compile things in the right order. For example if your application is already compiled and has no changes, but your library is not, it may link against the library before it compiles. Your library will compile after and so the next time you run your application, you’ll see your changes. For this reason I would turn off “Parallelize Build” in the Scheme editor. This will make sure that the library is built first, then correctly added. This is an intermittent issue, and depends upon the size of the project, and destination. For example, you may see this more in the Simulator vs. device, or on an OS X app.
I realize that some of this entry has a ‘I don’t know why I do this but it works’ vibe. My hope is that this article can provide some info and others can give me some info in return. If you can help clarify anything in this article, leave a comment below!
